

I remember the first time I tried to install Ubuntu on my VPS. It was a nightmare—long hours spent googling error messages, struggling to navigate through a maze of commands, and feeling completely overwhelmed.
I had read plenty of tutorials, but none of them seemed to make it as simple as they promised. Sound familiar?
Fast forward to today, and I can confidently say that installing Ubuntu on a Hostinger VPS is much easier than it seems—if you have the right guide. That’s exactly why I’ve put together this step-by-step process. Whether you’re running a website, managing a database, or just tinkering with server-side projects, Ubuntu on your VPS will give you the flexibility and power you need. Let me take the complexity out of the equation and show you how to get Ubuntu installed seamlessly on your Hostinger VPS. Ready to turn that daunting task into a breeze?
Let’s get started!

Why Choose Ubuntu?
Ubuntu is one of the most popular Linux distributions due to its ease of use, robust performance, and strong community support. Here are a few reasons to consider Ubuntu for your Hostinger VPS:
- User-Friendly: Ubuntu offers an intuitive interface that simplifies server management, making it accessible even for those new to Linux.
- Extensive Documentation: The Ubuntu community provides a wealth of resources, tutorials, and forums, making it easy to find help and solutions to common issues.
- Regular Updates: Ubuntu’s regular release cycle ensures that you have access to the latest features and security patches.
- Versatility: Ubuntu can be used for various applications, from web hosting to software development, providing flexibility to meet your needs.
· · ─ ·𖥸· ─ · ·
Step-by-Step Guide to Installing Ubuntu on Hostinger VPS
Step 1: Access Your Hostinger Account
- Log in to your Hostinger account.
- Navigate to the VPS section in your control panel.
Step 2: Select Your VPS Plan
If you haven’t already, choose the VPS plan that best suits your needs. Make sure to select a plan that provides adequate resources for your intended use.
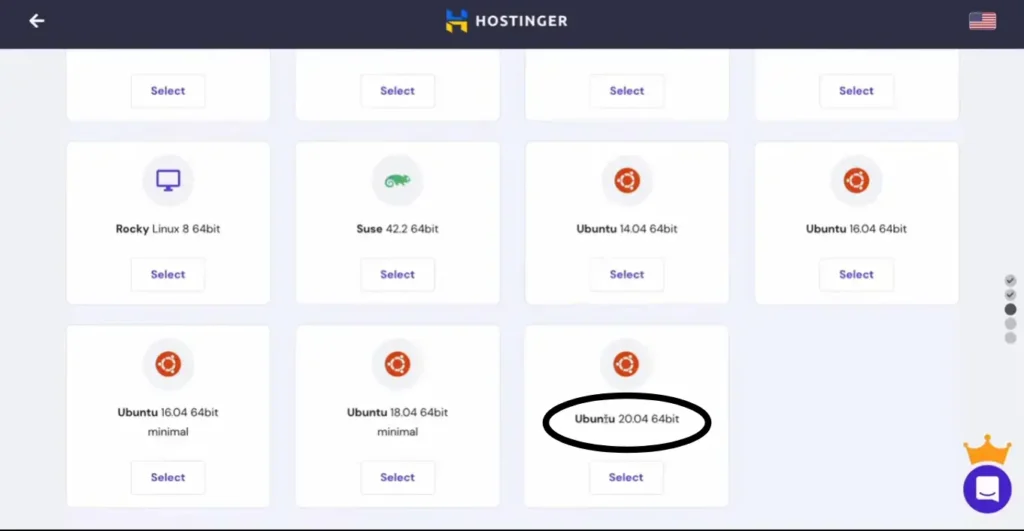
Step 3: Choose Ubuntu as Your Operating System

- Choose OS with Contol Panel.
- In the VPS management panel, locate the Operating System selection.
- From the dropdown menu, choose the desired version of Ubuntu (e.g., Ubuntu 20.04 LTS or Ubuntu 22.04 LTS).
- Click on the Install button to initiate the installation process.
Step 4: Wait for the Installation to Complete

The installation process usually takes a few minutes. Once completed, you will receive an email containing your server’s IP address, username, and temporary password.
Step 5: Access Your Ubuntu Server
Use SSH to connect to your server. Open your terminal (or use an SSH client like PuTTY) and enter the following command:
ssh username@your-server-ip Replace “username” with the provided username and “your-server-ip” with your server’s IP address.
When prompted, enter your temporary password.
Relevant topics:
- How to Access Your Hostinger VPS Using SSH
This guide covers how to create SSH accounts on Hostinger, generate secure SSH keys, and connect to your VPS using an SSH client like PuTTY (for Windows) or Terminal (for Linux/Mac). You’ll learn how to securely manage your VPS remotely. - How to Set Up SSH Key-Based Authentication for Remote Login Without a Password
Learn how to set up SSH key-based authentication for remote SSH login without a password. Secure your server by following this step-by-step guide on generating SSH keys, copying them to the server, and disabling password authentication. - How to Prevent SSH Session Timeout on macOS and Linux
Learn how to keep SSH sessions alive on macOS and Linux by configuring your SSH client and server settings to prevent automatic disconnections. Follow our step-by-step guide to ensure uninterrupted remote access. - Getting Started with Shell Scripts
Learn how to write and run Shell Scripts. This guide covers the basics, benefits, use cases, and provides practical examples.
Step 6: Perform Initial Setup
Once logged in, it’s crucial to perform some initial setup tasks:
Update the Package List: Run the following command to update your package list:
sudo apt updateUpgrade Installed Packages:
Upgrade your installed packages to the latest versions:
sudo apt upgradeSet Up a Firewall: Consider setting up a firewall to enhance security:
sudo ufw allow OpenSSH sudo ufw enable· · ─ ·𖥸· ─ · ·
Conclusion: Ubuntu on Hostinger VPS—You’re Ready to Go!
Congratulations! You’ve successfully navigated the process of installing Ubuntu on your Hostinger VPS. What once felt like a complicated task is now something you can handle with confidence. By following this guide, you’ve unlocked a powerful tool that’ll give you the freedom to manage your server with ease.
But this is just the beginning! Now that your VPS is up and running with Ubuntu, the possibilities are endless. From deploying websites and applications to experimenting with server configurations, you’ve set the foundation for countless projects. Ready to dive deeper into the world of VPS hosting? Continue exploring, and you’ll be amazed at what you can achieve. Don’t stop here—your journey to mastering VPS hosting starts now!
Leave a Reply