

Flex Sensors on ESP32 feel like magic—once you figure out how to read subtle bends without false triggers.
When Flex Sensors Taught Me More Than Just Bending
I still remember the first time I plugged a flex sensor into my ESP32 board. It felt like a magic trick — tiny bends in a strip of plastic turning into signals my code could understand. But that magic came with frustration. The readings jittered, false triggers popped up, and most tutorials left me guessing. As an advocate of Free and Open Source Software, I knew the solution wouldn’t come from proprietary shortcuts or pricey gear — it had to come from understanding the hardware deeply and sharing that knowledge openly.
Flex sensors on ESP32 are deceptively simple but incredibly powerful when you know how to tame their quirks. This guide pulls back the curtain on the real pinout tricks, filtering tips, and code tweaks you need — all with open-source tools you can inspect, modify, and share freely.
Ready to turn your ESP32 into a gesture-detecting powerhouse with flex sensors? Keep reading and get hands-on with the techniques that unlock real-world motion detection, without the guesswork or closed-source black boxes.

How Flex Sensors Actually Work: The Basics Behind the Bend
Flex sensors are deceptively simple components that act like variable resistors. When you bend the sensor, its internal resistive element changes length, which alters its resistance. The more it bends, the higher the resistance — this change can be measured as a varying voltage level.
Think of a flex sensor as a bendable ruler that reports how curved it is by changing its electrical “stretchiness.” This physical property means your ESP32 doesn’t directly measure bend angle but rather a voltage proportional to the amount of flex.
Understanding this fundamental helps when you’re interpreting sensor readings or troubleshooting why your sensor behaves differently at certain angles. It’s not magic — it’s physics, and it obeys the same laws whether you’re prototyping or building a product.
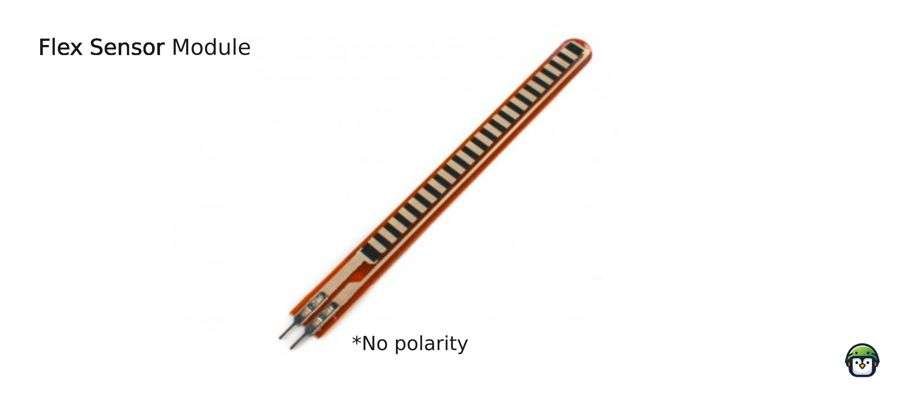
Materials Needed
To follow this tutorial, you’ll need:
- ESP32 microcontroller
- Flex sensor (e.g., 2.2-inch or 4.5-inch variants)
- Resistor (10kΩ recommended for voltage divider)
- Breadboard and jumper wires
- MicroUSB cable for programming
· · ─ ·𖥸· ─ · ·
Wiring Diagram
Here’s how to wire the flex sensor to the ESP32:
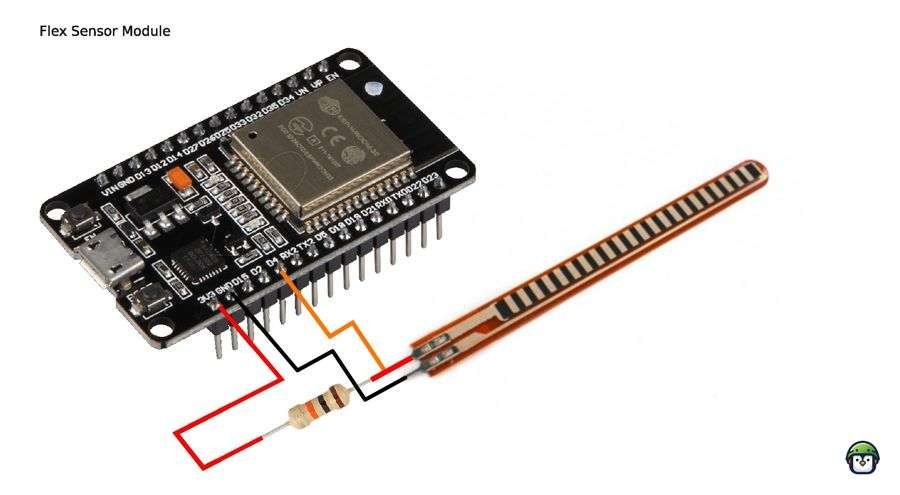
- Voltage Divider Setup: Connect one end of the flex sensor to 3.3V and the other to one leg of a 10kΩ resistor.
- Input Pin: The junction between the flex sensor and resistor connects to an analog pin (e.g., GPIO 4) on the ESP32.
- Ground: Connect the other end of the resistor to GND.
· · ─ ·𖥸· ─ · ·
MicroPython Code Example
from machine import ADC, Pin
import time

# Setup the flex sensor pin
flex_sensor = ADC(Pin(4))  # GPIO 4
flex_sensor.atten(ADC.ATTN_11DB)  # Full range: 0-3.3V

while True:
    sensor_value = flex_sensor.read()  # Read the analog value
    print("Flex Sensor Value:", sensor_value)
    time.sleep(0.5)
How the Code Works
- ADC Configuration: The
ADCclass configures the ESP32 to read analog signals from the flex sensor. - Reading Values: The
read()function captures the resistance changes as a numeric value, which corresponds to the degree of bending. - Output: These values can be used to trigger actions or control devices based on the level of flex detected.
· · ─ ·𖥸· ─ · ·
Cleaning Up Noisy Flex Sensor Signals: Software Filtering Basics
Flex sensor readings can be noisy and twitchy, causing false triggers that frustrate beginners. Luckily, you don’t need proprietary tools to smooth the signal — a simple moving average filter or low-pass filter algorithm works wonders.
For example, by averaging the last 5–10 readings, you reduce sudden spikes or drops that aren’t caused by actual sensor bends. Here’s a quick snippet illustrating a basic moving average in MicroPython:
readings = []
def smooth_read(value):
    readings.append(value)
    if len(readings) > 10:
        readings.pop(0)
    return sum(readings) / len(readings)
Integrating this into your main loop means your ESP32 reacts only to meaningful bends, not electrical noise. This little tweak makes your gesture controls way more reliable, without any closed-source black boxes or complex hardware.
· · ─ ·𖥸· ─ · ·
Applications and Project Ideas
- Gesture-Controlled Devices: Use flex sensors to build a glove that controls a robotic hand or triggers actions based on finger movements.
- Wearable Fitness Trackers: Measure body posture or joint movements for fitness or rehabilitation applications.
- Interactive Gaming: Integrate flex sensors into gaming controllers for enhanced user interaction.
· · ─ ·𖥸· ─ · ·
Flex Sensors and ESP32 — Smarter Together with Open Source
Bringing flex sensors to life on the ESP32 isn’t just about bending hardware; it’s about bending the barriers of accessibility and knowledge. With the right open-source approach, you can harness subtle movements into meaningful data — powering gesture controls, wearables, and more without expensive gear or locked-down software.
You’ve seen how to decode the flex sensor’s quirks, stabilize noisy readings, and build reliable motion detection. Now, imagine what you could build next — armed with open knowledge and a thriving community.
Don’t miss out on more practical guides, free tools, and hands-on projects that empower you to innovate and share. Subscribe to the DevDigest Newsletter and join a growing network of makers and advocates turning open source into real impact.
Leave a Reply