

You don’t need a fancy IDE to set up an ESP32 development environment—you just need to know where to look.
When I first got into ESP32 development, every tutorial told me to “just install the Arduino IDE.” And I did—until I realized I was spending more time waiting on compiles and clicking through dropdowns than actually writing code. It felt like buying a sports car and never getting out of first gear.
As someone who lives and breathes FOSS, I knew there had to be a better way—one that put me in full control, didn’t waste resources, and worked beautifully on aging laptops and low-power setups. That’s when I decided to set up a lean, efficient ESP32 development environment using MicroPython, CLI tools, and nothing I couldn’t audit, script, or improve.
If you want to develop faster, with fewer moving parts and full transparency over your stack, this guide walks you through the process—IDE-free and fully FOSS-friendly.
Read on to set up your own ESP32 development workflow in minutes—with just the tools you actually need.

What Exactly Is MicroPython—and Why Use It on ESP32?
Before diving into setup, it’s worth understanding what you’re actually installing.
MicroPython is a lightweight, re-implementation of Python 3 optimized to run on constrained devices like microcontrollers. Think of it as a stripped-down interpreter that fits inside the ESP32’s flash memory and gives you Pythonic access to pins, sensors, and networks—without compiling C.
Unlike Arduino, MicroPython:
- Doesn’t need a compiler or IDE
- Offers an interactive shell (REPL) for real-time control
- Encourages scripting over boilerplate
- Is FOSS, extensible, and hackable
But it also has limits:
- No native multithreading
- Less complete peripheral support
- Slightly slower than native code
💡 FOSS Tip: If your use case is sensor prototyping, automation, or teaching—MicroPython on ESP32 strikes an excellent balance between simplicity and power.
· · ─ ·𖥸· ─ · ·
Two Ways to Flash MicroPython Firware on the ESP32:
Flash MicroPython Firmware on the ESP32 Using esptool
Before you can start programming your ESP32, the first essential step is to install the MicroPython firmware onto the device. MicroPython is a lightweight version of Python designed specifically for microcontrollers, and it enables you to run Python code on your ESP32. However, it’s critical that you download and install the latest stable version of the MicroPython firmware to ensure you’re working with a reliable and fully-supported version.
To begin, head to the official MicroPython firmware download page for ESP32. On this page, you’ll see a list of available firmware versions for the ESP32.
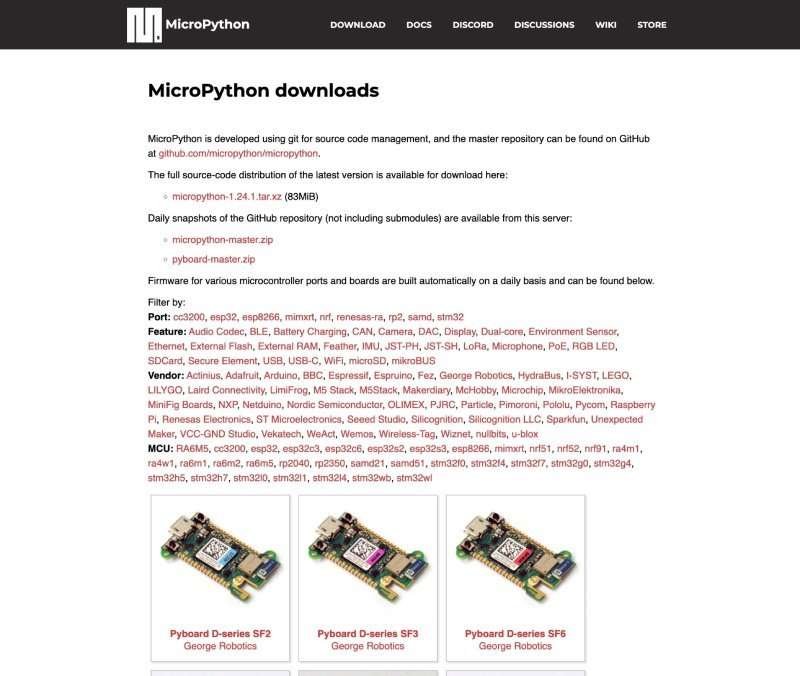
Always download the latest stable version, as this ensures the firmware is free from known bugs and includes the latest features and fixes.

To identify the latest stable version, check for the version labeled as “Stable” on the download page. Typically, the most recent stable version will be prominently featured at the top of the list, along with release notes and version numbers. It’s crucial to avoid downloading development or nightly builds, as these may contain experimental features or unfinished code that could cause unexpected behavior or issues. The stable version is generally the one recommended for most users.
Once you’ve downloaded the correct firmware version, you can proceed with flashing it onto your ESP32. This can be done using the esptool.py utility, a command-line tool that makes it easy to interact with the ESP32’s flash memory. The process of flashing the firmware is straightforward, but using the latest stable version will help minimize the risk of running into bugs or compatibility issues during development.
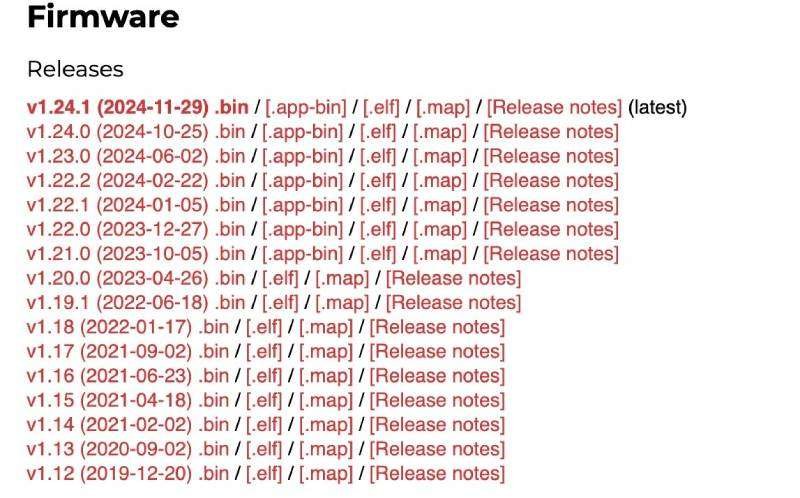
To ensure you’re using the right firmware, always double-check the release notes linked on the MicroPython download page. These notes will provide information on any significant updates, new features, or bug fixes included in the release, helping you stay informed about changes to the firmware and ensuring that you are using the most up-to-date and stable version available.
Resources:
Instructions
Download the ESP32 Firmware: Visit the MicroPython firmware download page and download the latest stable firmware for your ESP32 board.
Install esptool.py: Install the esptool.py utility by running the following command in your terminal:
pip install esptoolErase Flash: Before flashing the new firmware, it’s important to erase the current flash. Connect your ESP32 to your computer, and use the following command to erase the flash memory:
esptool.py --chip esp32 erase_flashFlash the Firmware: Once the flash is erased, upload the MicroPython firmware using the following command:
esptool.py --chip esp32 --port /dev/ttyUSB0 write_flash 0x1000 esp32-xxxx.bin Replace /dev/ttyUSB0 with the correct serial port and esp32-xxxx.bin with the firmware you downloaded.
Once the firmware is successfully flashed, your ESP32 is ready to run MicroPython.
Flash MicroPython Firmware Using Thonny
Alternatively, Thonny IDE can also be used to flash MicroPython firmware directly to the ESP32, offering a more streamlined process.
Instructions:
Download and Install Thonny: Visit the Thonny download page and install the IDE for your operating system.
Connect the ESP32: Plug the ESP32 into your computer.
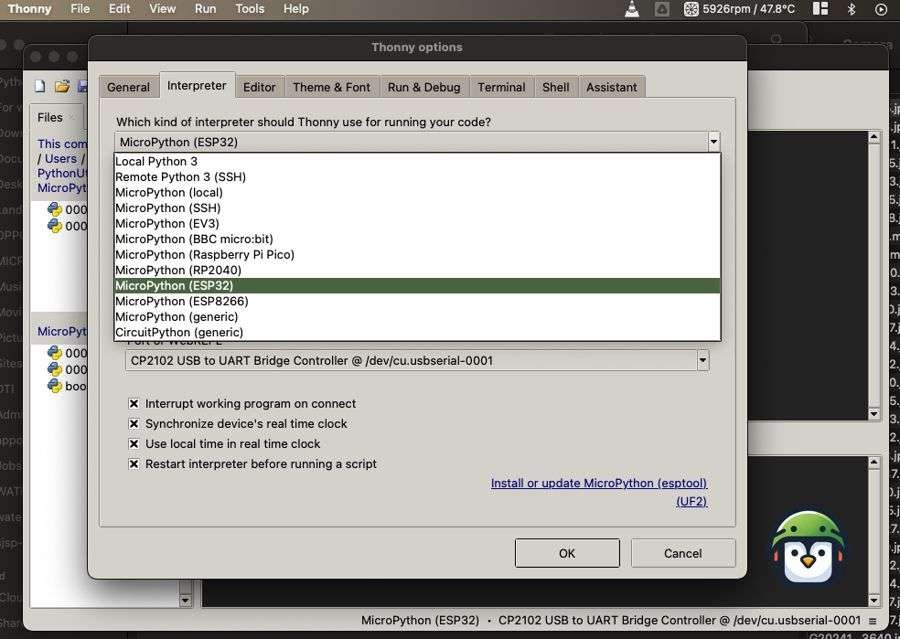
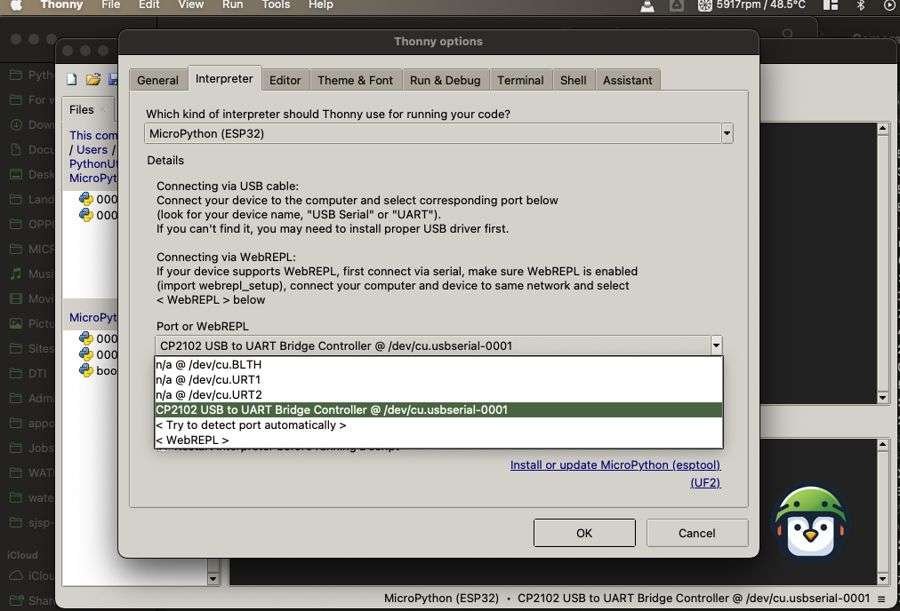
Select the MicroPython Interpreter: Open Thonny, go to Tools > Options, and under the Interpreter tab, choose MicroPython (ESP32).
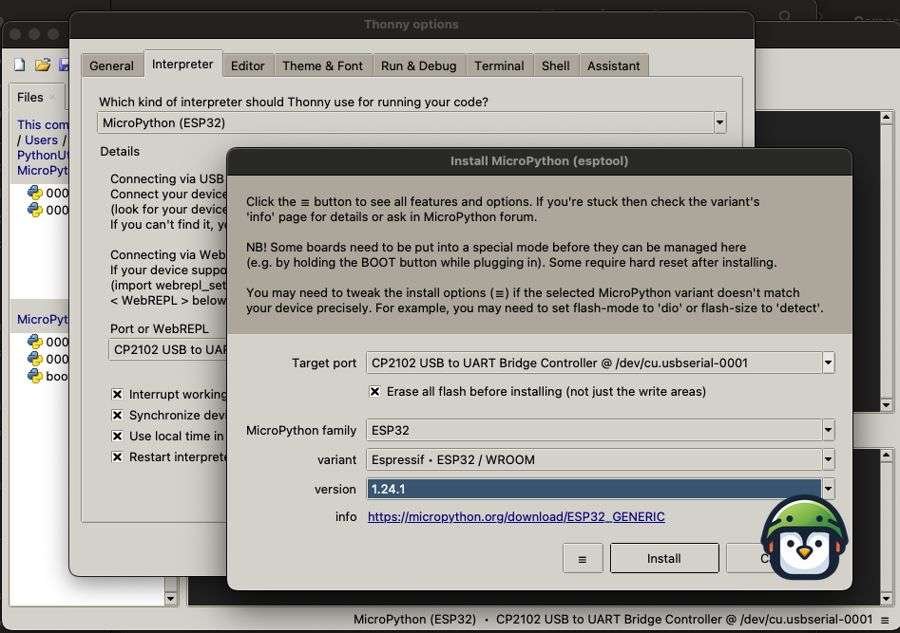
Install MicroPython: Thonny will automatically detect that MicroPython is not installed on the ESP32. Follow the prompts to install the firmware directly through Thonny.
- Go to File>Preferences>Interpreter.
- Choose MicroPython (ESP32)
- At the bottom, click Install or update MicroPython (esptool)
- Select the USB port where your ESP32 is installed
- Select the appropriate MicroPython, variant, and version.
- Click Install.
- This will automatically download the necessary firmware to your computer and flash it to your firmware.
Once installed, your ESP32 will be ready for programming via Thonny.
Write Your First Script
Now that the firmware is in place, you can write your first simple “Hello World” script for the ESP32. In this example, we’ll print a message to the Thonny console.
Instructions:
Open Thonny: Launch Thonny IDE and ensure it is connected to the ESP32.
Write a Basic Script: In the Thonny editor, write the following code to display “Hello, ESP32!” in the Thonny shell:
print("Hello, ESP32!")Upload the Script: Click the Run button in Thonny to upload the script to the ESP32 and execute it. The message “Hello, ESP32!” will appear in the Thonny shell.
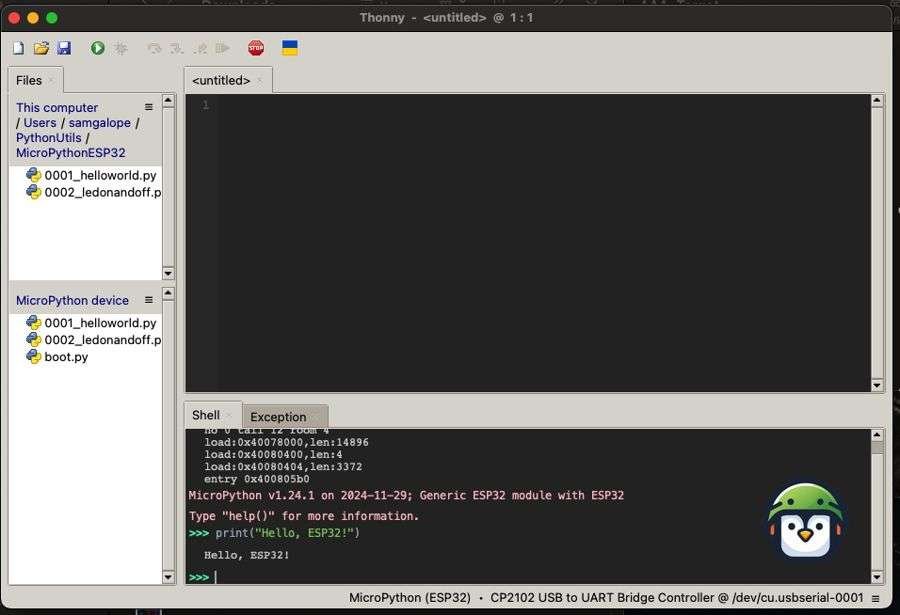
This simple script demonstrates how to interact with your ESP32 using MicroPython and Thonny.
· · ─ ·𖥸· ─ · ·
Bonus: Clean Python Tooling Without Sudo
On older systems or shared setups (schools, labs), users often can’t sudo pip or don’t want to taint their global environment.
Here’s how to set up a clean, user-only MicroPython toolchain:
- Install
pipx: bashCopyEditpython3 -m pip install --user pipx python3 -m pipx ensurepath - Install MicroPython tools: bashCopyEdit
pipx install esptool pipx install mpremote - All tools will now live in your local
$HOME/.local/bin, safe and portable.
🌱 This makes your ESP32 dev workflow reproducible and beginner-safe—without needing root access or breaking system Python.
· · ─ ·𖥸· ─ · ·
Conclusion: A Minimalist Stack That Gets Out of Your Way
Your ESP32 Deserves a Dev Environment That Works With You, Not Against You
Setting up a proper ESP32 development environment isn’t just about flashing code—it’s about building a workspace that respects your time, your hardware, and your brain. Whether you’re teaching students on recycled laptops or scripting automation in your off-grid lab, MicroPython and a lean toolchain can go a long way.
You don’t need bulky GUIs or confusing SDKs to get started—you need clarity, control, and just enough abstraction to keep you moving. And when things break (as they do), you’ll actually understand why—and fix it yourself.
If this guide helped you ship faster, teach smarter, or just feel more in control of your tech—don’t miss the next one.
Subscribe to the DevDigest newsletter for more FOSS-first tutorials, MicroPython tips, and real-world ESP32 workflows.
Let’s keep hacking. Responsibly.
Like what you’re reading?
Help keep DevDigest
free and caffeine-powered
—buy me a coffee on Ko-fi.
Leave a Reply