

My Reed Switch Sensor wouldn’t trigger—until I realized I was holding the wrong magnet.
When I first wired up a Reed Switch Sensor to my ESP32, I was expecting a clean digital trigger the moment I waved a magnet near it. Instead—nothing. I rechecked the GPIO pin, reviewed my code, swapped jumper wires. Still dead.
Turns out, the problem wasn’t the sensor. It was the magnet. I had grabbed a fridge magnet—not nearly strong or directional enough to flip the reed. One neodymium later, the ESP32 came to life, chirping out pin state changes like it had just had its morning coffee.
This tiny episode reminded me why I love working with open hardware: everything is a lesson, and the smallest components (literally) can have the biggest impact. In this guide, I’ll walk you through how to correctly wire a Reed Switch Sensor to ESP32, how to code it in MicroPython, and what magnetic gotchas to avoid if you want consistent readings.
Whether you’re building a DIY door sensor, a stealthy motion alert, or just want your ESP32 to react to the real world, keep reading—this guide will save you hours.

What is a Reed Switch Sensor?
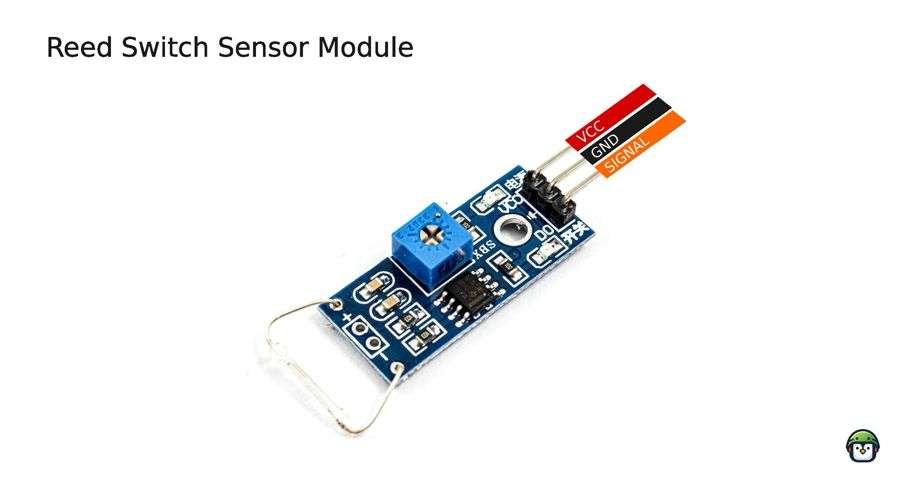
A reed switch sensor is an electrical component that opens or closes a circuit in the presence of a magnetic field. It consists of two flexible metal reeds encased in a glass tube filled with inert gas. When a magnet is brought near, the magnetic field causes the reeds to move, either making or breaking contact. This simple mechanism makes the reed switch sensor an energy-efficient and reliable tool for magnetic field detection.
Related:
· · ─ ·𖥸· ─ · ·
Why Use a Reed Switch Sensor with ESP32?
The ESP32 is a feature-rich microcontroller known for its low power consumption, Wi-Fi and Bluetooth connectivity, and extensive GPIO capabilities. By integrating a reed switch sensor, the ESP32 can detect magnetic fields and trigger specific actions, such as logging events, sending notifications, or controlling other devices. This combination is ideal for creating smart systems that require proximity sensing or state detection.
Wiring the Reed Switch Sensor to ESP32
To connect a reed switch sensor to the ESP32, follow these steps:
- Components Needed:
- ESP32 microcontroller
- Reed switch sensor
- 10kΩ pull-up resistor
- Magnet
- Breadboard and jumper wires
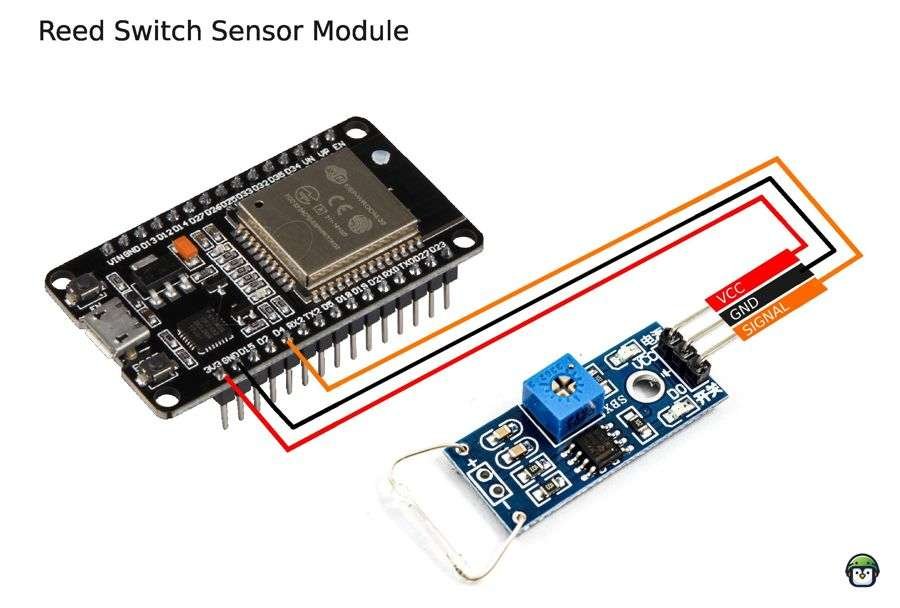
- Connections:
- Connect one terminal of the reed switch sensor to a GPIO pin on the ESP32 (e.g., GPIO 4).
- Connect the other terminal of the reed switch sensor to GND.
- Place a 10kΩ pull-up resistor between the GPIO pin and the 3.3V pin of the ESP32.
This setup ensures that the GPIO pin reads a stable HIGH signal when the reed switch sensor is open and LOW when it is closed.
· · ─ ·𖥸· ─ · ·
Programming the ESP32 for Reed Switch Sensor Detection
Here’s a simple MicroPython script to read the state of the reed switch sensor:
from machine import Pin
import time

# Configure GPIO 18 as input with a pull-up resistor
reed_switch_sensor = Pin(18, Pin.IN, Pin.PULL_UP)

while True:
    if reed_switch_sensor.value() == 0:
        print("Magnetic field detected!")
    else:
        print("No magnetic field.")
    time.sleep(0.5)
This code continuously checks the state of the reed switch sensor. When the magnet is near, the GPIO pin reads LOW, and a message indicating the detection of a magnetic field is displayed. Otherwise, it prints that no magnetic field is present.
Practical Applications
By using a reed switch sensor with the ESP32, you can create various practical systems:
- Security Systems: Monitor doors and windows for unauthorized openings. When the magnetic field is interrupted (e.g., a door is opened), the ESP32 can trigger an alarm or send a notification.
- Proximity Detection: Detect the presence or position of an object with an embedded magnet, useful in industrial automation.
- Smart Home Devices: Integrate into smart home setups to control lighting or appliances based on proximity.
· · ─ ·𖥸· ─ · ·
When Simplicity Meets Precision
A Reed Switch Sensor may seem like one of the simplest components in your electronics kit—but pair it with the ESP32, and you unlock a world of elegant, low-power magnetic sensing. From securing cabinets to building offline automation triggers, this combo is perfect for makers who value clarity, precision, and FOSS-friendly flexibility.
The key is knowing what to wire, how to code, and—yes—which magnet to use.
Want more FOSS-powered guides, no-fluff build logs, and hardware lessons that don’t talk down to you?
Subscribe to the DevDigest newsletter and get practical tutorials and bite-sized insights delivered straight to your inbox. No hype. Just the hacks that work.
Let’s build the future—one trigger at a time.
Like what you’re reading?
Help keep DevDigest
free and caffeine-powered
—buy me a coffee on Ko-fi.
Leave a Reply